As consumers become more and more habituated with dynamic experiences for products they use, the best way to meet this demand is by using data to ensure hyper-personalized experiences. Incorporating personalization and recommendations are ways to build strong customer relationships and yield robust consumer insights. Despite the advantages, adopting machine learning may get difficult and time-consuming without appropriate results.
In this post, we will discuss how Amazon Personalize can improve customer experience and how we implemented the same in one of the applications.
What is Amazon Personalize?
Amazon Personalize is a wholly managed, machine learning (ML) based system that allows real-time personalization and recommendations. It democratizes machine learning development by using the same technology used at Amazon.com, thereby, ensuring a more seamless experience.
What can you do with Amazon Personalize?
- Personalized, AI-backed consumer experience without ML proficiency
- Provide personalized recommendations to consumers based on their purchase behavior.
- Solve problems like cold starts and address popularity biases.
- Enhance user intent.
- Create custom marketing campaigns, offers, and tailored results for consumers Improve conversion rate by deploying real-time user activity data.
- Accurate recommendations.
Step 1: Data Preparation & Loading Data
Note: We built an application that shows news articles to users and we used Amazon Personalize as a recommendation engine to show similar news articles based on the current article.
So, to begin with we need to select an algorithm that fits into our usecase, our usecase is to show the similar articles to the user based on the selected article and Personalize offers various algorithms based on common use cases so, we chose similar-items algorithm.
Now, an algorithm to work Personalize requires datasets. There are three types of datasets:
- Users:– This dataset stores metadata about your users. This might include information such as age, gender
- Items:– This dataset stores metadata about your items. This might include information such as price, categories.
- Interactions:– This dataset stores historical and real-time data from interactions between users and items
In our case, Users were application users, Items were articles and Interactions were the activities like (User viewed/liked particular article)
But for the similar-items algorithm we only need article dataset
and very limited interaction dataset with a minimum of 1000 unique interactions.
Before creating a dataset we need to create a Dataset Group A dataset group is a container for all the Personalize components and Dataset Schema A schema tells Personalize about the structure of your data and allows Amazon Personalize to parse the data.
similar-items algorithm uses item’s metadata to calculate the similarity between the two items
for example:- in our case article has some labels (Sports, Entertainment, Pandemic, etc) associated with it
and we can add labels as metadata for the articles in a schema.
This is how our JSON schema would look like:-
Items Schema

   {
      "type": "record",
      "name": "ITEMS",
      "namespace": "com.seeeff.personalize.schema",
      "fields": [
         {
            "name": "ITEM_ID",
            "type": "string"
         },
         {
            "name": "LABELS",
            "type": [
               "null",
               "string"
            ],
            "categorical": true
         },
         {
            "name": "CREATION_TIMESTAMP",
            "type": "long"
         }
      ],
      "version": "1.0"
   }
Interactions Schema
{
"type": "record",
"name": "Interactions",
"namespace": "com.amazonaws.personalize.schema",
"fields": [
{
"name": "USER_ID",
"type": "string"
},
{
"name": "ITEM_ID",
"type": "string"
},
{
"name": "TIMESTAMP",
"type": "long"
}
],
"version": "1.0"
}Once a schema is created we need to feed these datasets to Personalize, we need to create a CSV for each of these datasets (which will have the same columns and the order in which specified in the schema) and upload it to the S3 bucket.
The below are sample CSV datasets of the article and user-article interactions to be imported to Personalize:-
   ITEM_ID,LABELS,CREATION_TIMESTAMP
   1,SPORTS|SCIENCE|INTERNATIONAL,1570003267
   2,ENTERTAINMENT|LIFESTYLE|,1571730101
   3,COVID|ECONOMICS|SPORTS,1560515629
   4,POLITICS|EDUCATION|TECHNOLOGY,1581670067
4,USA|GENERAL|HEALTH,1581670067 USER_ID,ITEM_ID,TIMESTAMP
35,2,1586731606
54,3,1586735164
9,4,1586735158
23,1,1586735697
27,2,1586735763Now, once the files are added to the S3 bucket, we need to create a Dataset Import Job. It is a bulk import tool that populates your dataset with data from your S3 bucket. We can create a dataset import job and import bulk records using the Amazon Personalize console.
Step 2: Create a Solution
After we finish preparing and importing data, we are ready to create a Solution. A Solution refers to the combination of Personalize algorithm and solution versions (trained models).
To create a solution in Amazon Personalize, we need to do the following:
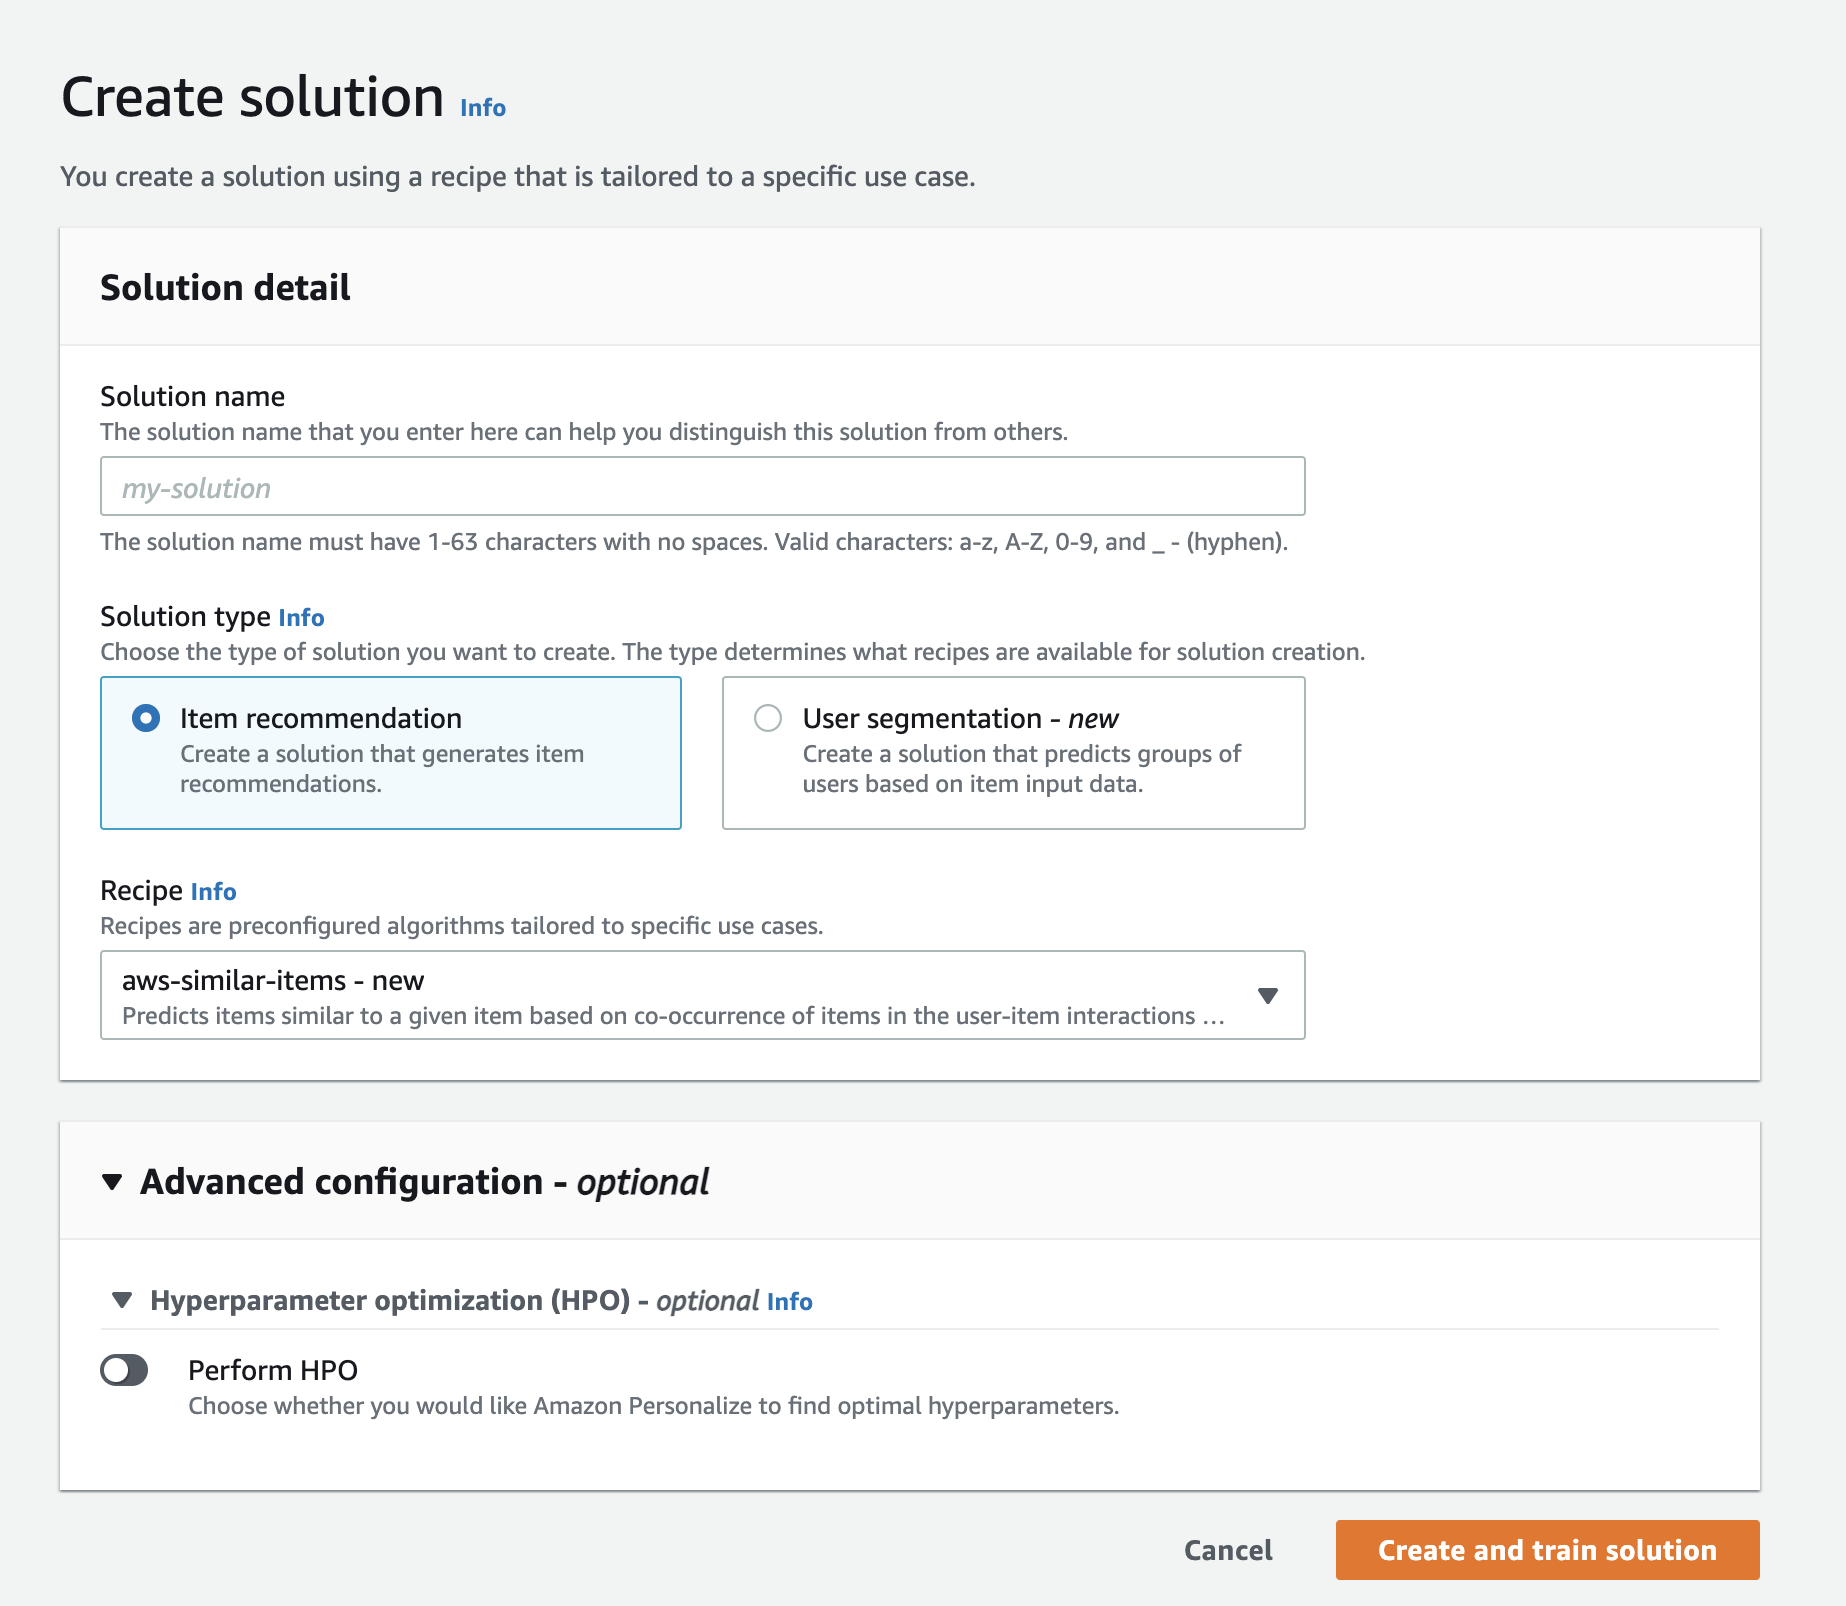
Choose a recipe – choosing a similar-items algorithm from the dropdown.
We can create a solution using the Amazon Personalize console.

Step 3: Create a Solution Version
After we complete configuring a solution, we are ready to create a solution version.
A solution version refers to a trained machine learning model we can deploy to get recommendations. We can create a solution version using the Amazon Personalize console.
Step 4: Create a Campaign
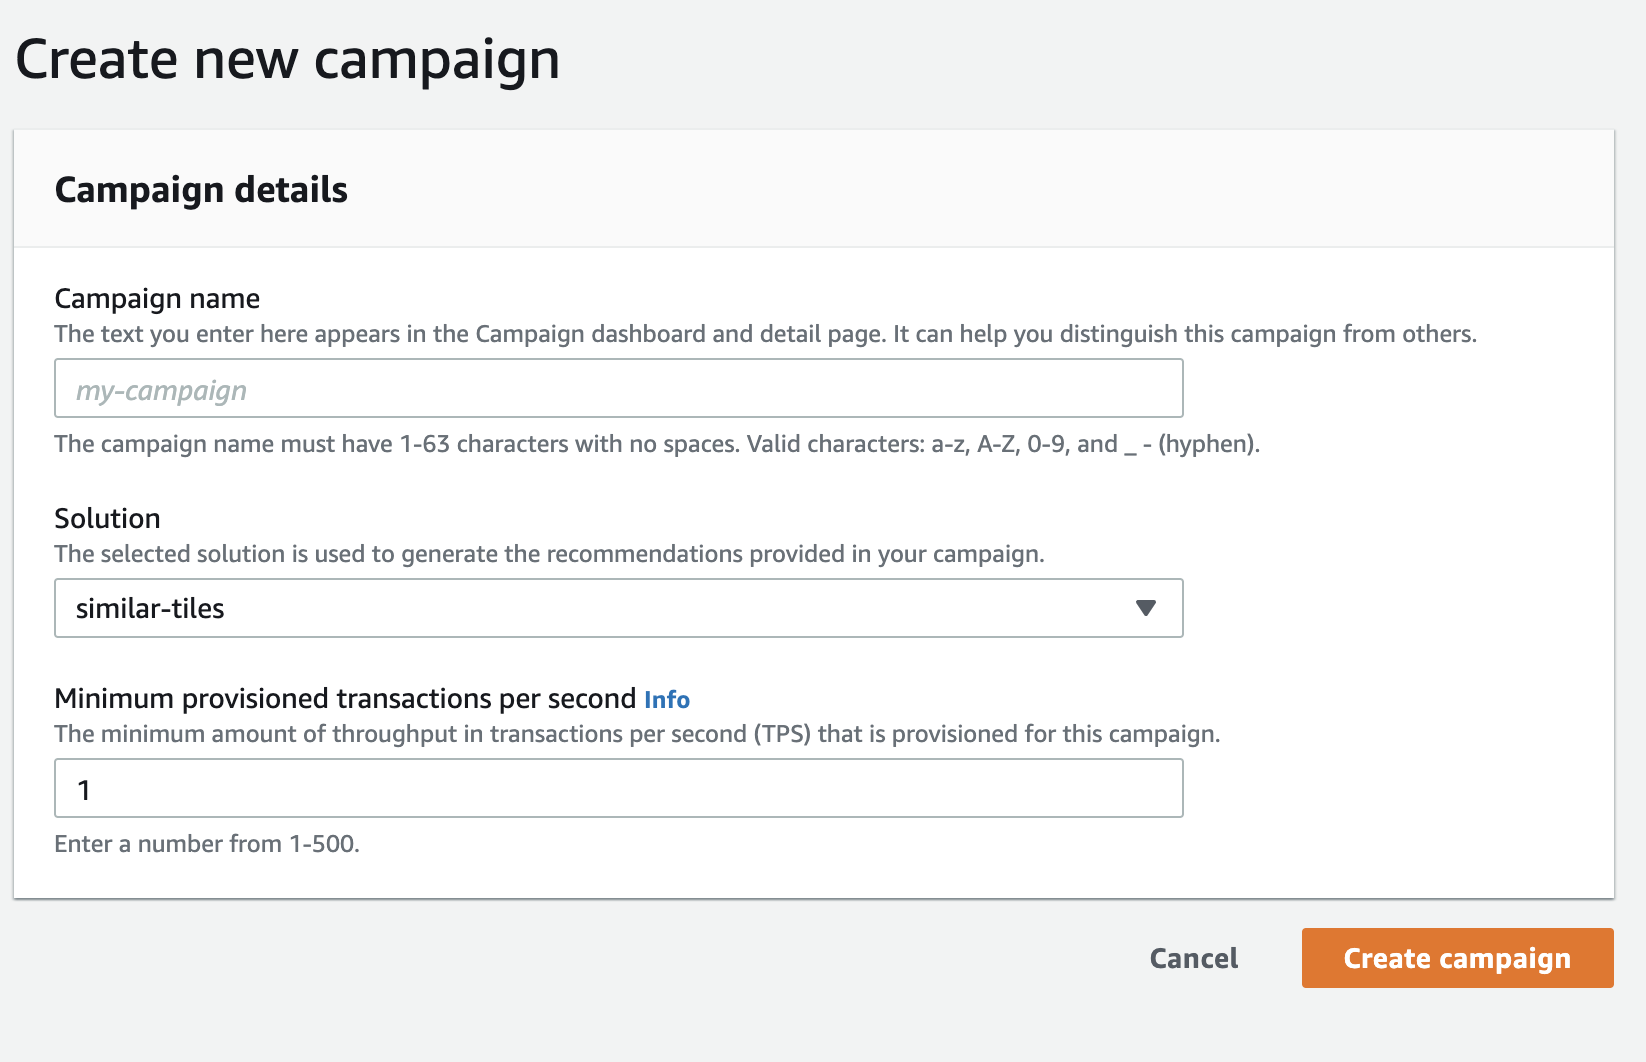
With Amazon Personalize, we can get recommendations in real-time or we can get batch recommendations. For real-time recommendations, we must create a campaign. For batch recommendations, we need to create a batch inference job. A batch inference job is a tool that asynchronously imports our batch input data from an Amazon S3 bucket, uses the solution version to generate item recommendations, and then exports the recommendations to an Amazon S3 bucket. In our case, we used real-time recommendations.
A campaign is a deployed solution version (trained model).
After we create a campaign, we can use the GetRecommendations API to get recommendations.
We can create a campaign using the
Amazon Personalize console.

Step 4: Fetch Recommendations
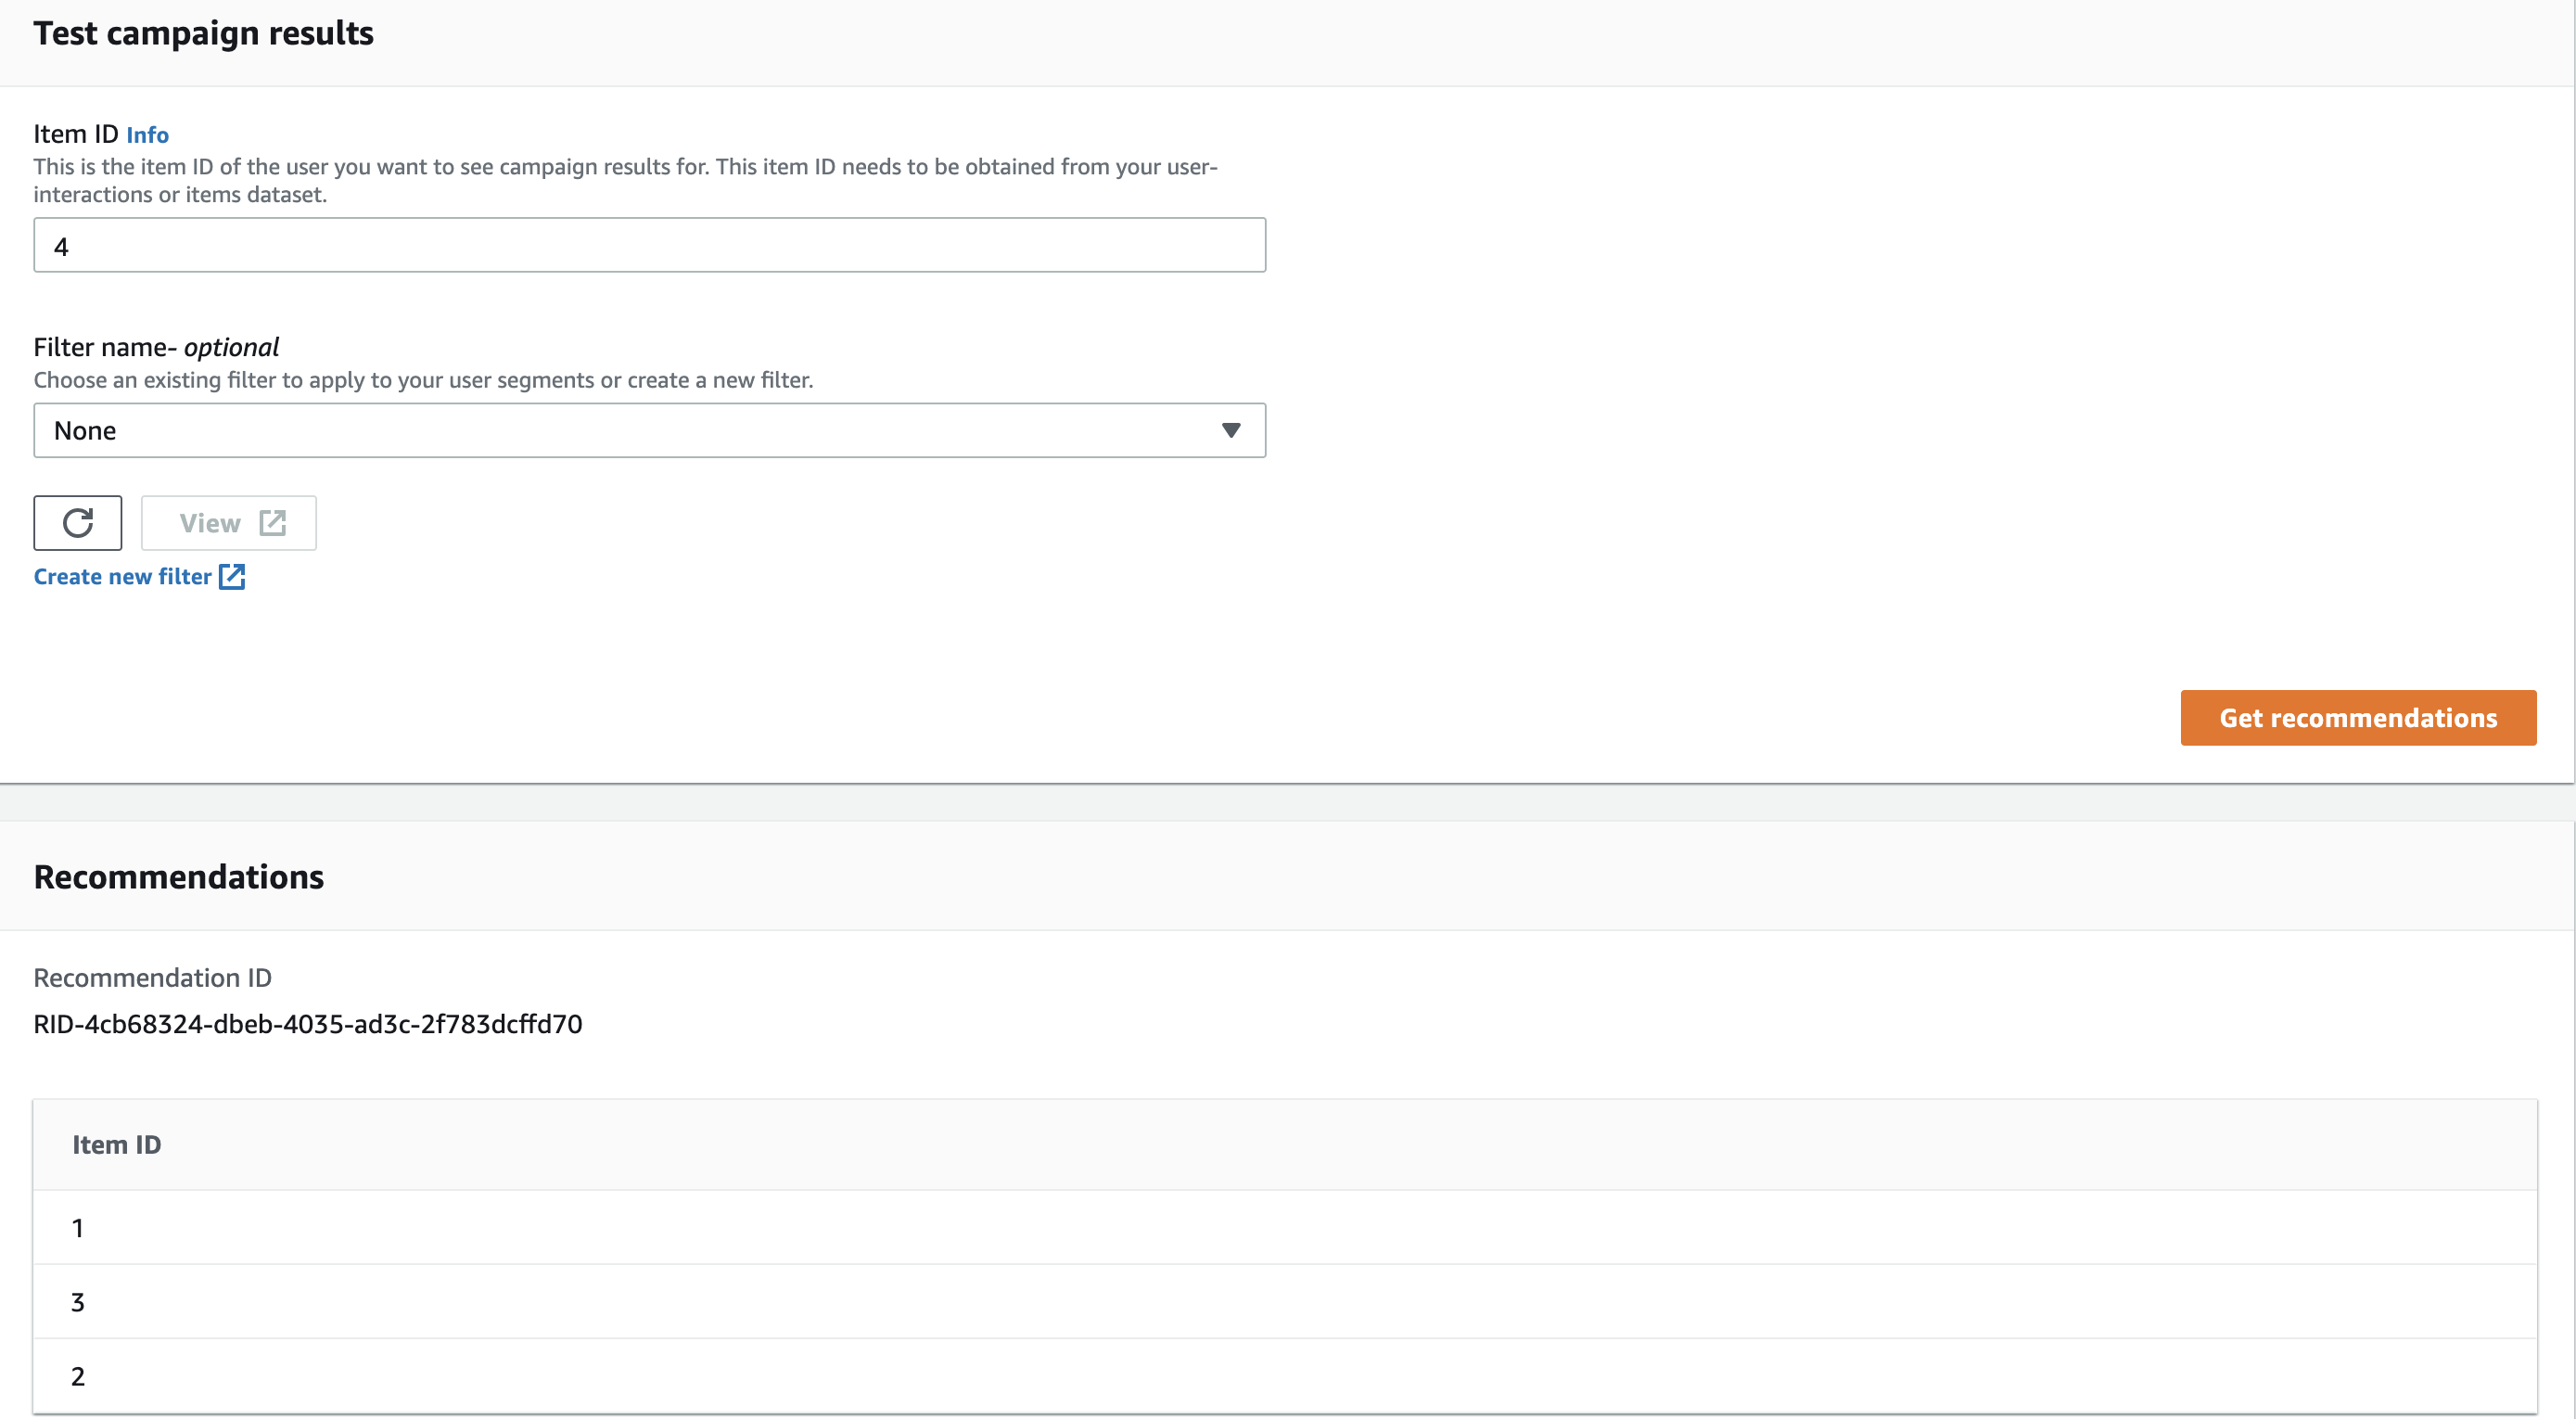
The final step is to fetch the recommendations so, either we can use Amazon Personalize console. Here, we can pass the itemId/articleId to fetch the recommendations and it will return the list of ids of similar articles.

or we can use personalize-sdk to fetch the recommendations
   runtime_client.get_recommendations({
      campaign_arn: campaign_arn, # Campaign ARN can be copied from campaign details
      item_id: item_id, # articleId for which we need to fetch the recommendations
      num_results: 25 # no of items need to be fetched
   })
Underlying Architecture
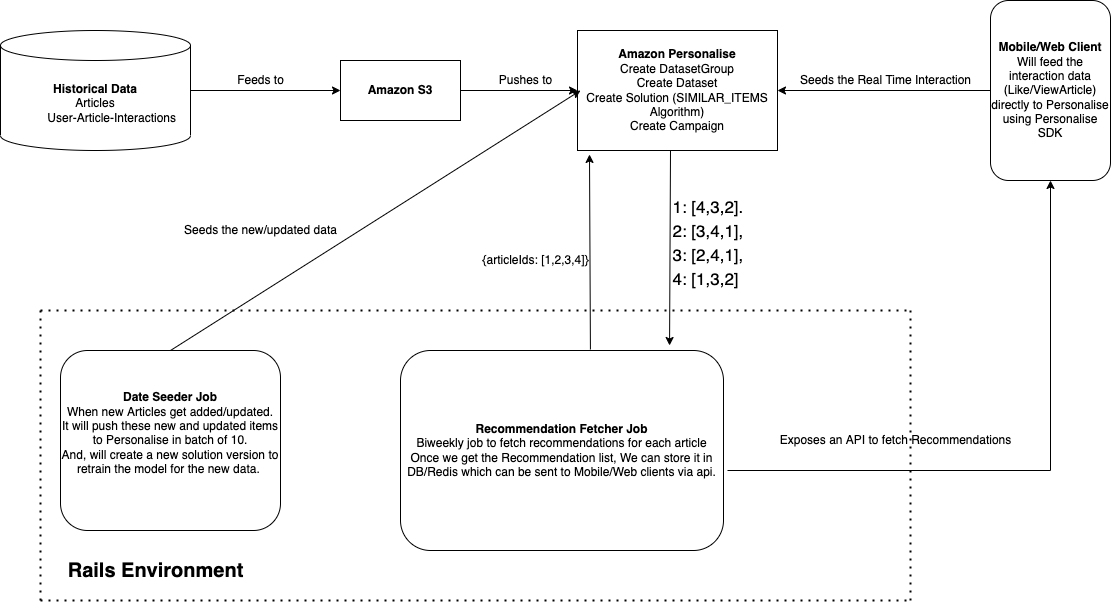
This is how our architecture looks like, we used historical data to create a solution version initially. Then, created a DataSeederJob to seed new or updated articles to personalize.
Also, we created a biweekly RecommendationFetcher Job which fetches the recommendations for each of the articles and stores them in the Redis which get served to clients via API.

Final Thoughts
In this blog, we talked about how we can create the most sought-after Recommendation System without ML expertise. Thanks to Amazon Personalize that enabled us to implement the use-case quickly in a hassle-free manner.
